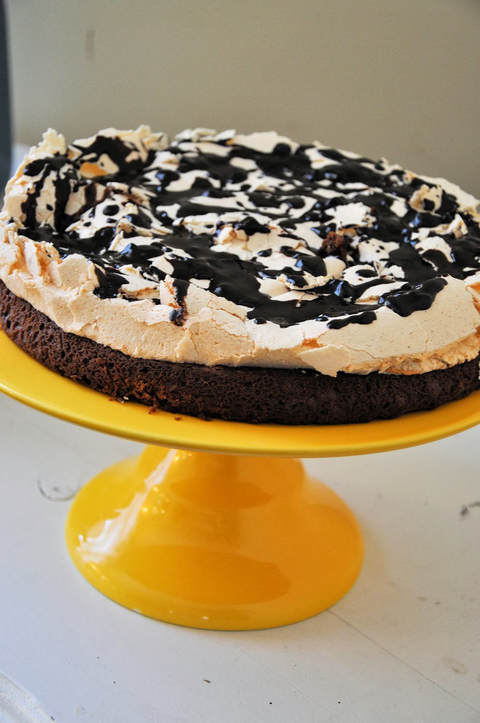
 Marina is visiting us from her home country, the Ukraine. While she was here for Christmas she asked if she could make a chocolate cake that she makes for her children in her Center back home. She whipped up the most delicious chocolate cake I think I have ever eaten. I asked her for the recipe and she said. "I make and show you, you write." Here is the recipe as best as I could do considering. Now that I've made this cake with her, I want to learn how to make many others from scratch. 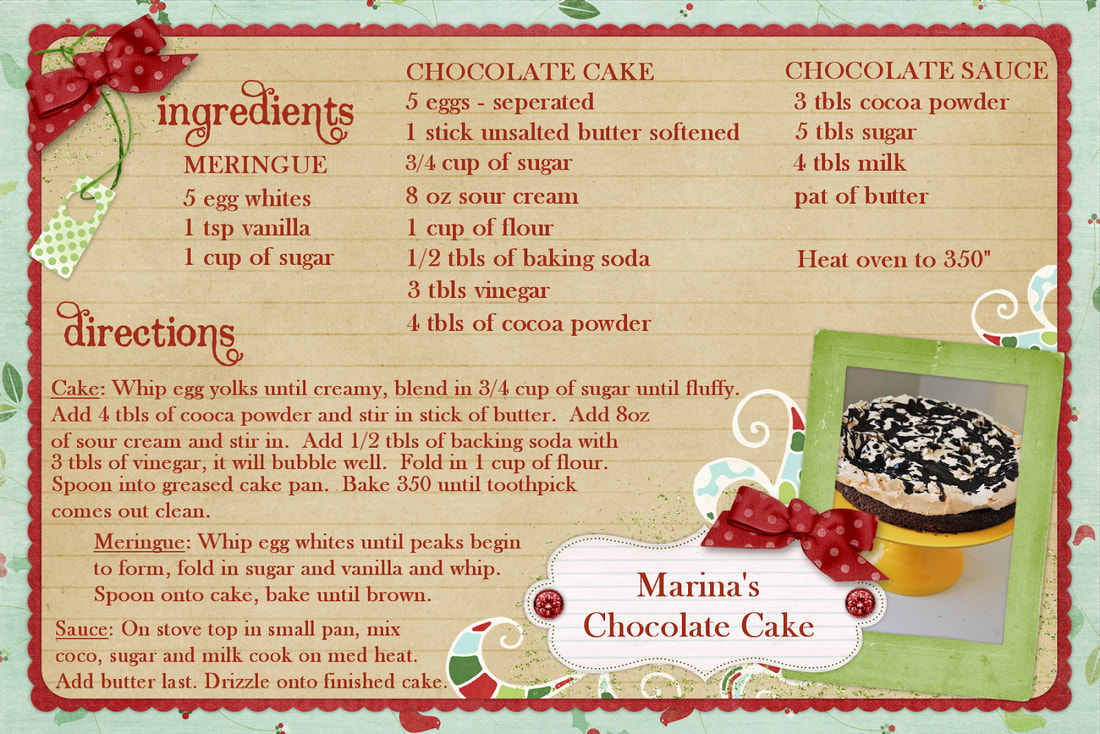
0 Comments
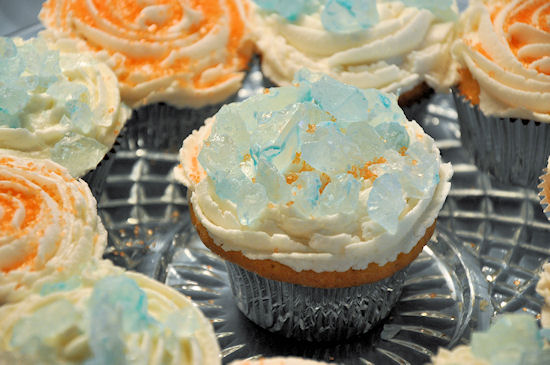 I made these for a shower and I thought they were too cute not to share. I am in love with decorating with rock candy. I wish I could have found it in orange but instead I used orange sugar. Her colors were navy, orange, light blue and grey. 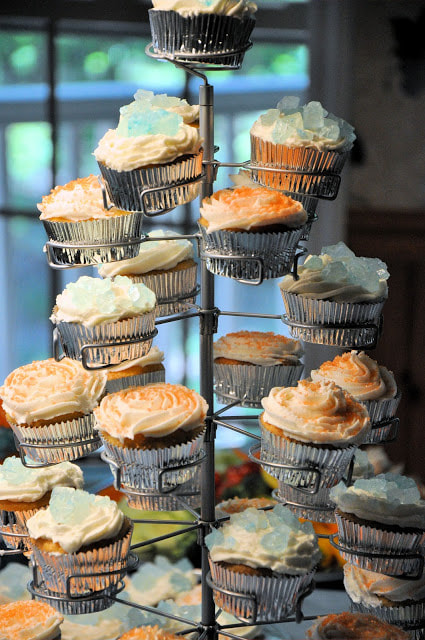 We are finishing up our study about Rocks and Minerals and we spent the whole day today reviewing what we have learned. In honor of sedimentary rocks, we built a sedimentary cake with different layers, different colors, textures and even gravel. Here's the how and why...
Purpose: To demonstrate a sedimentary rock formation Materials:
Results: A cake with a series of layers has been constructed Why? Sedimentary rocks are formed from loose particles that have been carried from one place to another and redeposited. These rocks usually are deposited in a series of layers similar to the layers of the cake. Each layer can be distinguished by differences in color, texture and composition. The oldest layer and lowest bed is deposited first and the youngest layer is at the top. The layers over a period of time become compacted and cemented together to form solid rock structures. 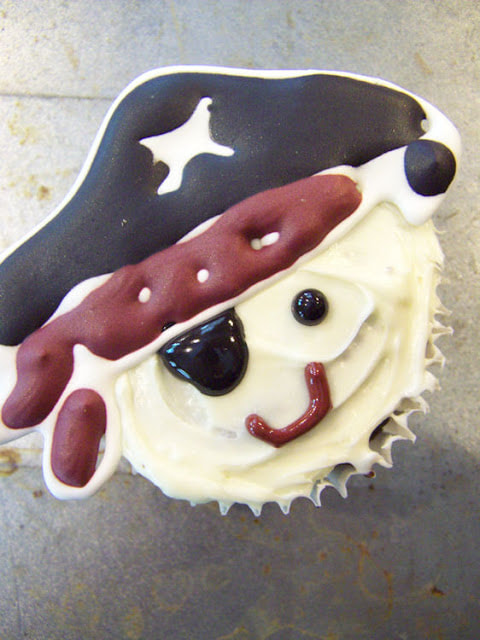 This is a new medium for me when it comes to cake decorating. I knew about this method and I had an idea. I was planning on decorating cupcakes for a Pirate Party we were hosting. My pirates needed hats and this is pretty darn close to what I had envisioned. When I started I didn't realize I was supposed to do this at least 48 hours in advance so please keep that in mind when planning a cake or in this case cupcakes. You will need the below ingredients and I use Wilton brand for coloring and for the color flow mix. Materials: 4 cups of sifted powdered sugar 2 tbs of color flow powder 1/4 cup of water plus 1 tbs Colors needed cardbord or cookie sheet any image you wish to duplicate wax paper Here's How: Place your design under your wax paper and secure with tape, then tape your wax paper to your cookie sheet or cardboard. Mix your ingredients for the color flow mix ingredient for 7 minutes on high with an electric mixer. Divide the color flow mix evenly for the colors you need. Add colors and mix. Red was the hardest color to achieve, so I added burgandy, black and copper for a dark red. Use a piping bag, I like the disposables, they are cheap and I can throw away the miss. Use a small circular tip. The smaller the better for finer details. TIP: Work fast to fill the bags as the color flow crusts over fast. Seal your piping bags well until ready to use. Now, here was my mistake. I was in a hurry and didn't have time to wait on anything to set properly so take your time and you will get superb results. Outline your design on your wax paper following the image you are duplicating. I outlined in white. Let the outline sit for 2 hours and harden. Add the fill colors as need and using a damp paint brush push the color flow to the edges of the outline. When filled, let set for 46 more hours until very hard. These are edible but more importantly, they are super easy to decorate with. A friend of mine said she did them a few times and likes to use coloring pages form kids coloring books for designs. Once your design hard you can remove the design or designs from the wax paper. If using more than one design, cut the wax paper to separate them. Using the edge of your counter top, roll the wax paper away from the design or you can use a small spatula and lift it away. This method worked best for me. Attach your designs using a dollop of icing when decorating. I actually can't wait to try this method again for a little more perfecting. The possibilities are endless and I was able to match the cupcakes to our invitations. 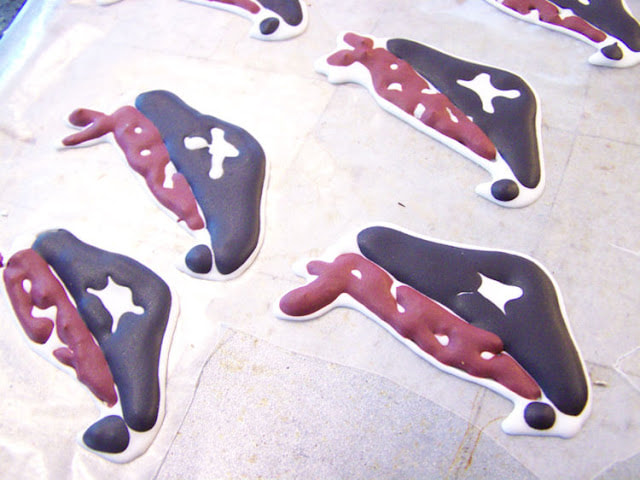 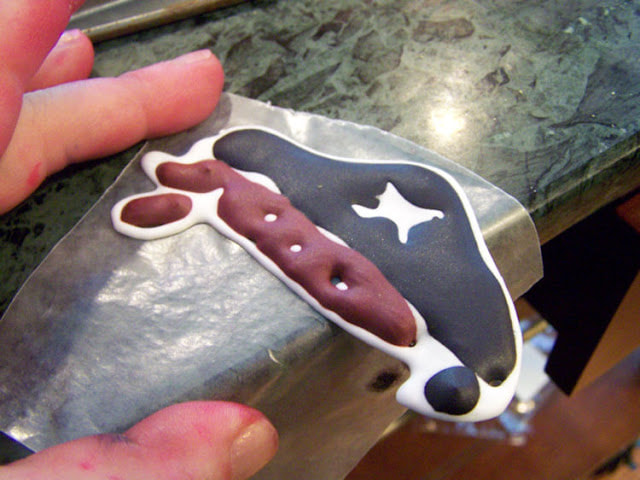 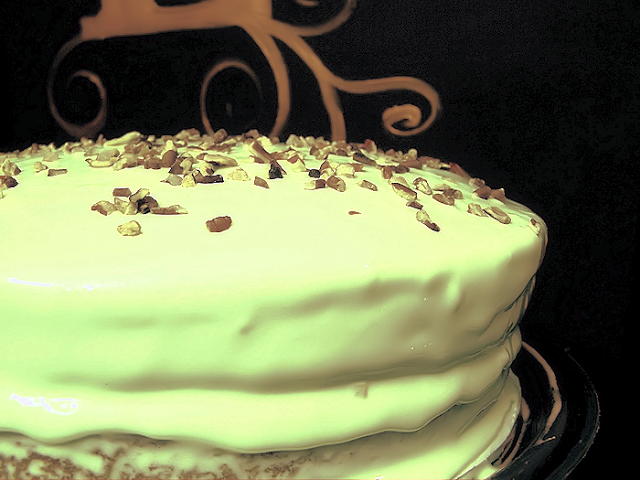 Well, of course I as a grown woman with children, you would think I would learn to do exactly as my mother says, right? Well, wrong! I can not do exactly like my mother says, not for spite but simply for the opportunity to take something old and classic and flip it around in my mind and make it my own.
I think it looks much yummier now that it would have in a pyrex dish with the icing poured on it. I hope I don't get in trouble. So, here's the recipe of my mom's with a touch of my own flair (well, if you'd call it "flair"). Water Gate Cake Ingredients
Sift together flour, baking powder, salt, and sugar. Cut in shortening until fine crumbs are formed. Add eggs, milk, and vanilla. Beat at low speed for 1 minute, then high for 2 minute. Slowly add pudding mix and pecans, scraping the bowl frequently. Pour batter into greased and floured 2, 8" or 10" round pans. Bake in preheated 350 degree F oven (175 degrees C) for 25 to 30 minutes. Make the Icing
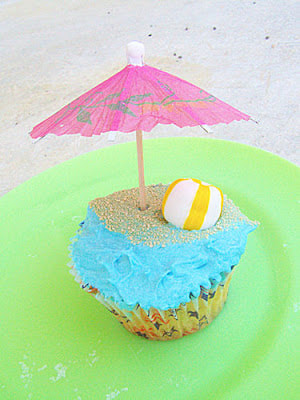 Bake your cupcakes and mix blue into your white icing.
Slather the icing on. Dip half of the cupcake in brown sugar or brownulated sugar (used here) Add a mint cady for a beach ball and a paper umbrella. The kids loved making these. |
Join Me...I love to cook but only if the meals are healthy, easy, and yummy. . 
I'm Aimee, former Early Childhood Educator and Reading Specialist turned author, speaker, blogger, and mom of 5. This website is meant to inspire & equip parents of little ones to promote early literacy & language development at home. You will also find fun crafts, devotionals, and recipes to explore..
Learn more about me here. Categories
All
|
 RSS Feed