|
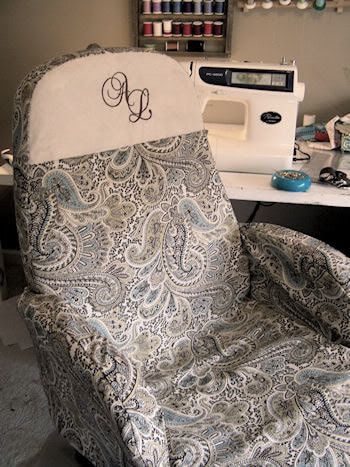
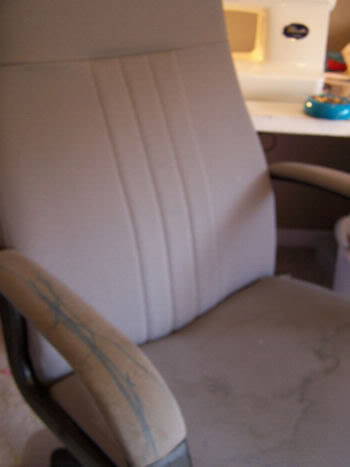
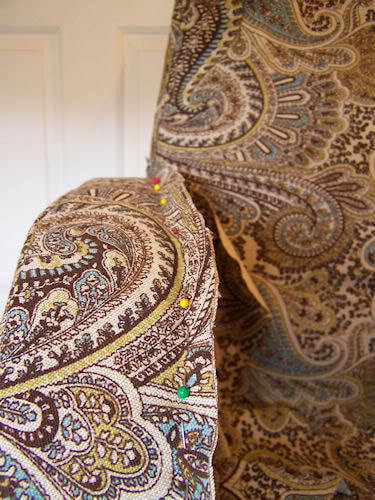
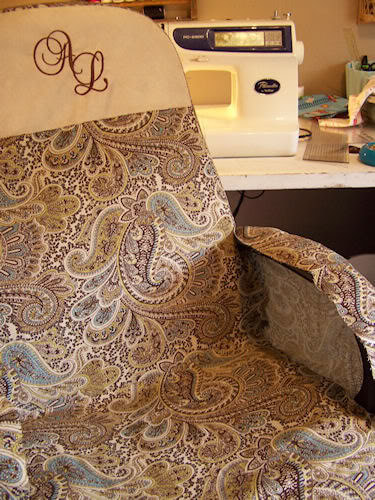
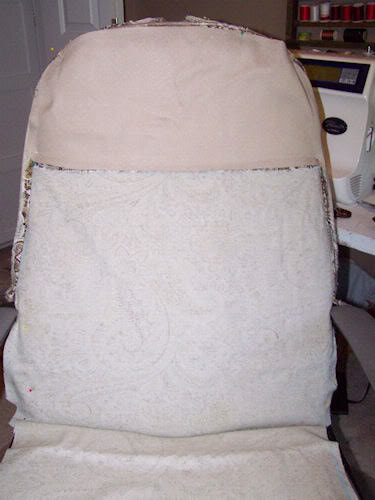
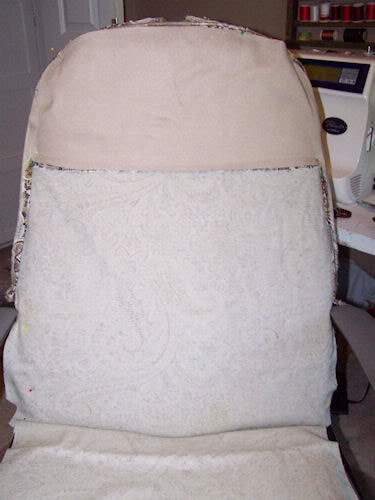
I've had this office chair for about 6 years and it has really been through it. I've put it in a yard sale twice and the sucker just kept sticking around. I probably priced it to high because of it's potential. When I started putting my new sewing room together, I grabbed it out of the garage, heaved the heavy thing up the steps and into my work room. I've been using it like it is with stains and scribbles for long enough. It's really embarrassing when someone comes to your sewing room and that's what is looming at them. A big hideous chair..so what's a girl on a super tight budge to do? Recover the blasted thing! That's what! Here's how! This is kind of a slow project and it takes about a day to complete if you are like me and have to start and stop constantly...so I have to get up early to finish one of these babies. Start buy pinning your fabric right side down in the positions you want and make sure you leave 1/2" seam allowance. I started with the front, using the natural lines and seams I grabbed my tailors chalk and started marking the seams underneath by feeling them with my fingers and marking. I did this in large sections, two sections on the front (I added a panel), the seat, the top of the chair and sides and the back. The hardest part was the arms, the key is to take your time, pin and iron and fit and re-fit before sewing. Pin ALOT! Oh and I had to add my initials on a piece of bone color ultra-suede. This is my chair almost finished. As you can see, I sewed the front, back, seat and sides together. I then added the arm by doing a strip down the top and around, then the outside panel. The inside panel was the trickiest but I didn't pin it right side down, I pinned it right side out like this. Making a tight seam line and refitting the arm again a little, it's easy to make adjustments, if you cut it a little big. Oh and anytime you are doing arms where the pieces are opposite but identical, make a pattern for one side and use it to cut the other. Here is my finished product...isn't she a beauty??? I'm going to give it a few days to see if I need to make more adjustments, there are a few spots I'll loosen the seams to relax it a bit, it's pulling oddly in a few places after adding the last panels. The side panels and back are a few inches longer to hide the handles underneath and are hemmed by turning them under twice. Easy Peasy! Makes me want to attempt my bonus room sofa!
0 Comments
Leave a Reply. |
�
Come on in...I'm Aimee, former Early Childhood Educator and Reading Specialist turned author, speaker, blogger, and mom of 5. This website is meant to inspire & equip parents of little ones to promote early literacy & language development at home. You will also find fun crafts, devotionals, and recipes to explore..
Learn more about me here. Categories
All
|
*Photos are reflective of a handmade or hand stamped design; including naturally occurring materials. It is not intended to represent the exact product you will receive. Variation in shape, color, size should be expected. Each pearl & stone is unique; each piece is unique.

 RSS Feed