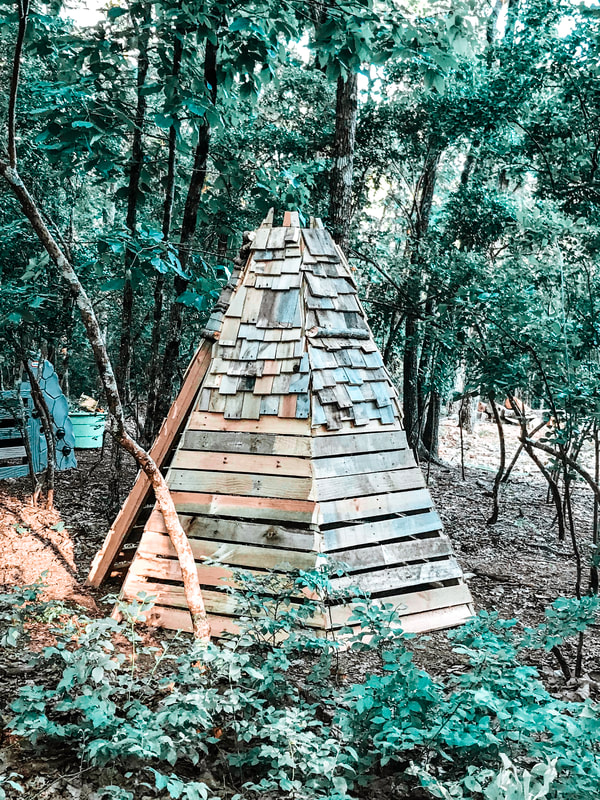
 I have this theory that if I remove all the plastic out of the woods around our house and replace it with organic and natural materials to play with, the kids will stay there longer and take ownership of their space. The transactional exchange they have with nature should be a positive one, much like the book The Giving Tree. Except, let's try to save the tree and save the kids in the process. I made up my mind to build them a teepee style place to play in the woods to replace their little tykes playhouse. I had the hardest time finding instructions, but I think it turned out pretty amazing and I'll try to walk you through the process. 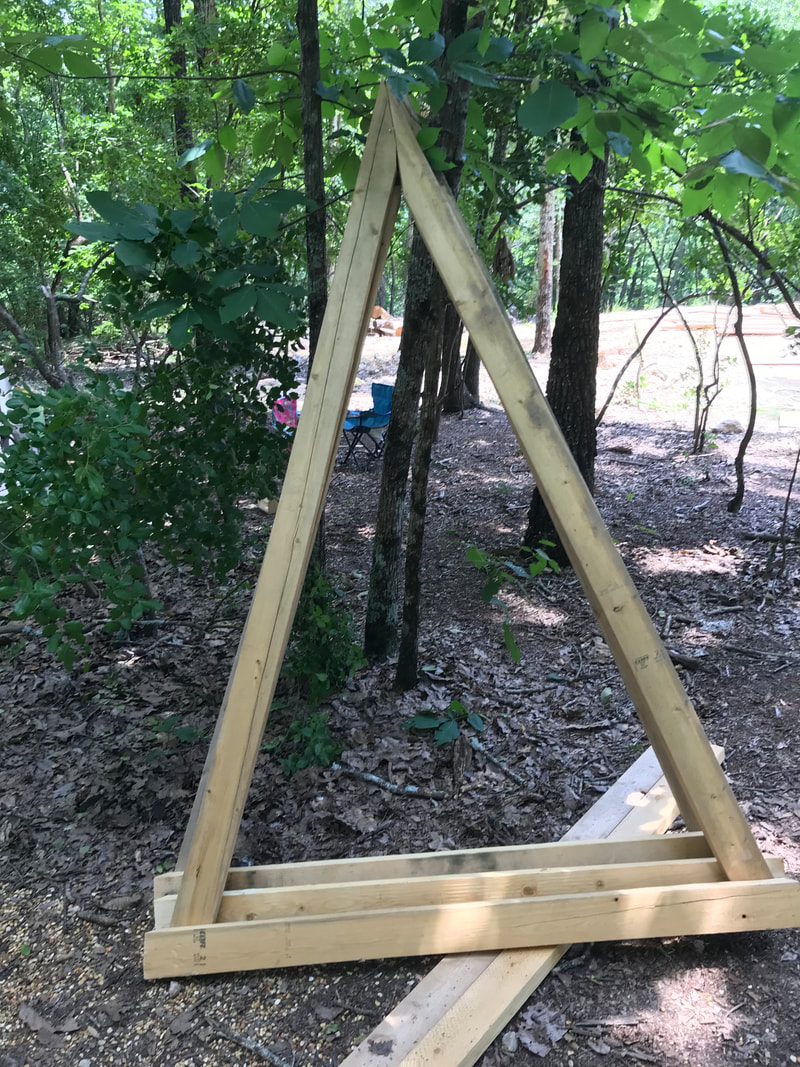 This was my first attempt, what I had in my head just would not come to life but I was able to use these pieces. Here are the materials I used. Affiliate Links included because that's how I feed my family. :D 6 - 14', 2x4 6 - scrap pallets 1 - sheet of plywood 1 - box of 2" exterior screws 1 - box of 1" roofing tack nails 1 - sawzaw and extra blades 1 - skill saw or miter saw 1 - hammer 1 - drill with star bit for trim screws (usually comes with box of screws) 1 - measuring tape 1 - carpenter square 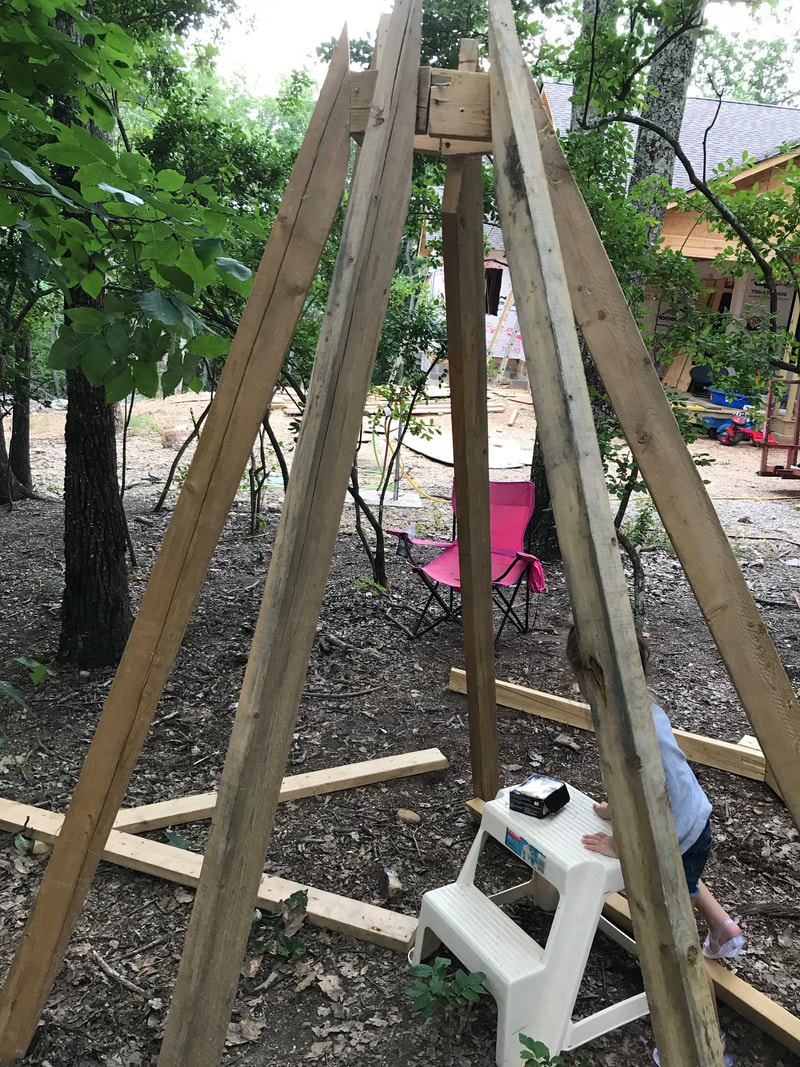 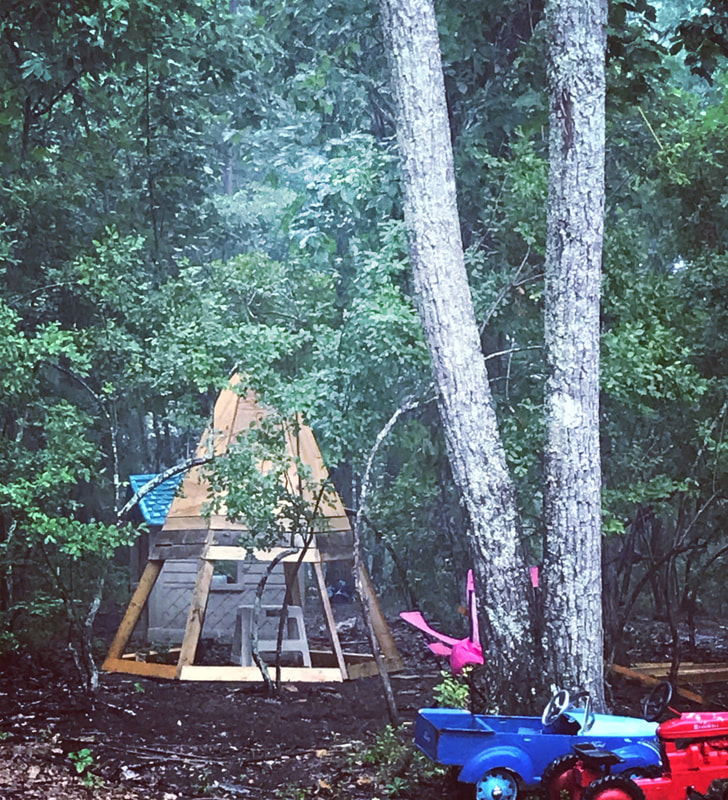
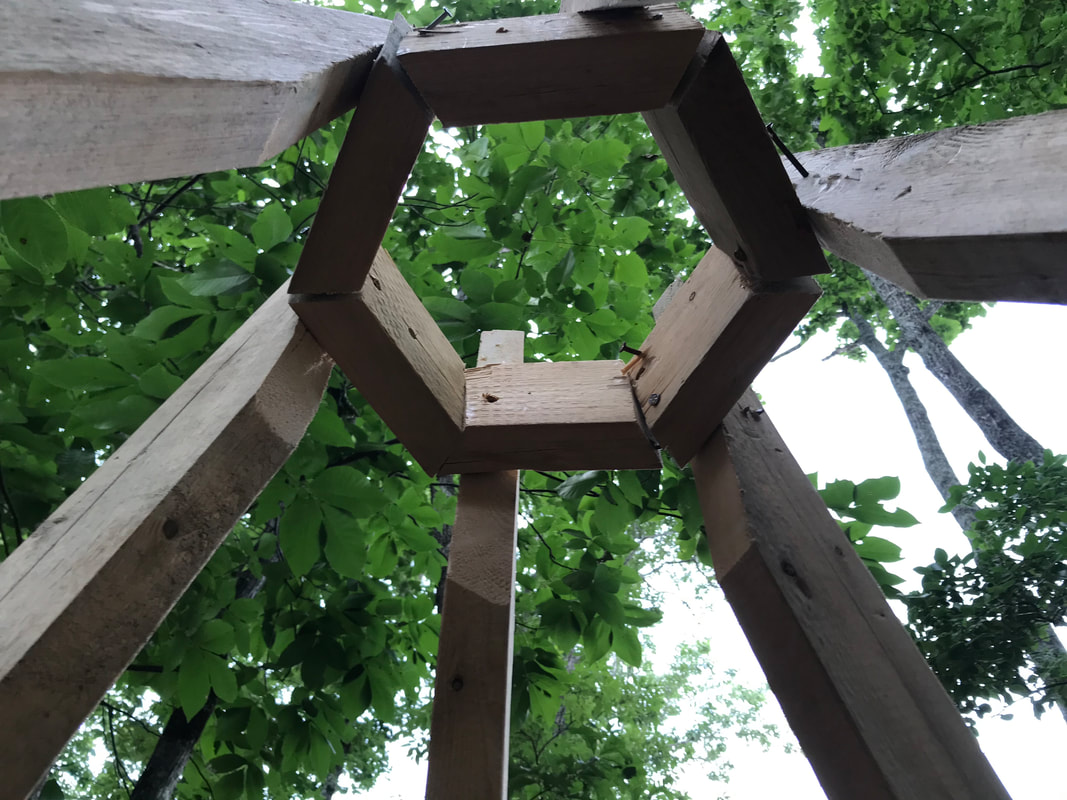 3. Cut and assemble the base frame. Using the 2 x4" pieces. Mine are 38" at its longest point with angles of 30 degrees like the above hexagon. I did not do 6, I just did 5 and assembled them leaving one end open. I then attached the 7' pieces to the frame at the bottom.  4. Be sure and measure these carefully. I cut a 7" across the top piece that was 16" long down the sides. Sometimes the length needed to be double checked but it also was 16" across. Check your measurements carefully before cutting. I was able to to "cookie" cut 5 pieces to go all the way around. I decided it wasn't enough so I did the process again for a second layer only I just cut 5, leaving one side without the second piece that was also missing the 6th bar of the frame. This created a doorway. I was trying to mimic the teepee design I had found below but they no longer have their instruction published. So, I was just going to have to wing it. 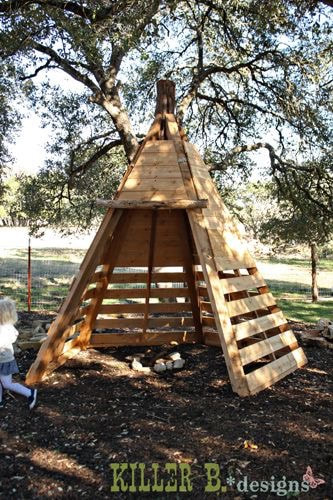 Photo belongs to Killer B. designs  5. I used the long pieces from the pallet wood to go around 5 sides of the teepee. I would do a complete side and then using the sawzaw trim off the excess before starting another side. 6. Then I decided I wanted the top to look like roofing. You could totally skip this step. I used scrap pieces to start with. I started at the lowest point of the plywood and nailed them with roofing tacks so they wouldn't got through the plywood. Each ends needed to be cut with a miter saw to get an angle that would work. I just laid a rectangle piece up and marked it where I needed to make the cut. This was the most time consuming part. I used pieces of wood to give it character too. 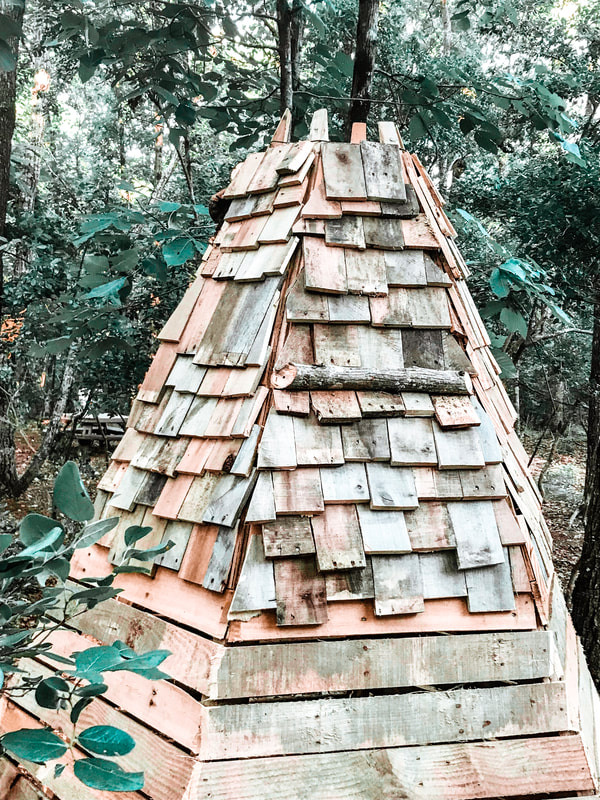 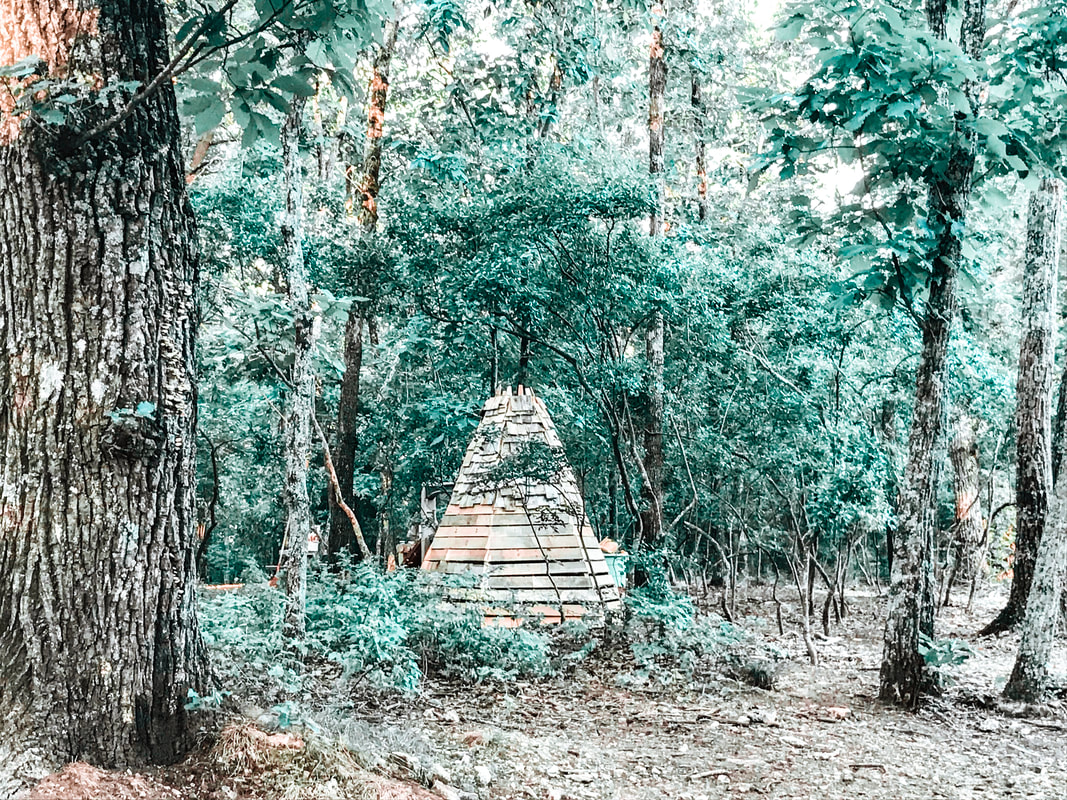 This sweet little structure is nestled among our Sparkleberry trees and with the addition of some solar powered twinkle lights in the top, it is as magical at night as it is in the day. I hope you make one for your little ones and if you do, please share it with me. I would love to see it. 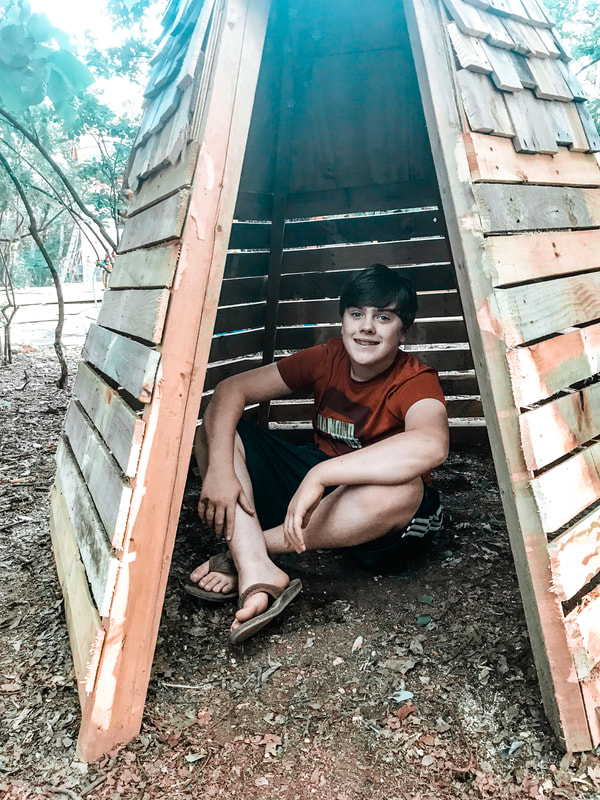
2 Comments
Aimee Larsen
2/12/2021 09:04:37 am
Thank you for your kind words. A Ninja Den sounds exactly like something my boys would ask for too. How fun!! Leave a Reply. |
About Us: Our adventure as a family of 7, building our dream home debt free in the wilderness of Georgia.

I'm Aimee, former Early Childhood Educator and Reading Specialist turned author, speaker, blogger, and mom of 5. This website is meant to inspire & equip parents of little ones to promote early literacy & language development at home. You will also find fun crafts, devotionals, and recipes to explore..
Learn more about me here. Archives
March 2020
Categories |
 RSS Feed